Monday, 31 December 2012
Wednesday, 19 December 2012
paper candle holder decoration
This was such an easy DIY and as sad as it may be I got pretty excited seeing my drawing light up. Everything I used was stuff I already had in the house, I used grease proof paper, a glass tumbler, scissors, tape and a pen.
Wrap a piece of grease proof paper around the glass and cut so you have roughly the right size but leave some extra. Draw on your design and then wrap back around. Use tape on the inside of the paper the secure and cut the excess. Make sure there isn't any paper sticking up over the top as its a little bit of fire hazard.
Light the candle and be amazed at your crafty awesomeness :)
Tuesday, 4 December 2012
Tuesday, 27 November 2012
Magazine photo frame
I have about a million fashion magazines in my house (I can't resist the pretty pictures!!!) and I hate chucking them out, especially the expensive ones. I saw something similar to this in Urban Outfitters and thought this might be a good idea to use some of them up.
All you need to make the frame is some cardboard, I used a cereal box, scissors, glue, magazines or any other nice paper you want to use and some cord or string to hang it up with.
Cut two pieces of card to the size you want the frame to be. Draw a box in the middle of one piece, about an inch from the edge and cut it out.
The fun part is choosing the paper you want to use, I choose bright backgrounds and nice fonts. Roll the paper up and glue the end down.
When you have made all the rolls of paper glue them down on to the cardboard along two lengths of the card. Then glue the paper rolls on to the other two sides over the top of the first ones. I used a glue gun to do this but you can use any kind of glue, I just love my pink glue gun.
Glue the second piece of card on the back and glue a piece of cord to the back in a loop so you can hang it up.
Wednesday, 14 November 2012
Wednesday, 31 October 2012
I've had an amazing few days in Lunac, France. It was beautiful and so cosy in the wintery weather. Unfortunately I took my camera but not my memory card so I didn't get an photos til I managed to buy one!
 |
| View of the castle from the main road through the town |
 |
| Beautiful chapel with an amazing stained glass window |
 |
| The view from the bottom of the castle |
 |
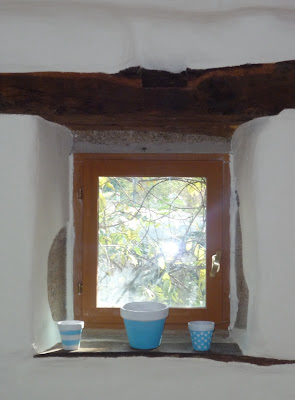
| Pots I painted as a little house warming gift for my parents |
Tuesday, 23 October 2012
Saturday, 6 October 2012
Sunday, 23 September 2012
DIY- detachable peter pan collar
1.ASOS 2.Topshop 3.Kate Spade 4.Moschino
Click image above for downloadable collar pattern.
Supplies:
Fabric- You don't need much at all so its great for using up scraps.
Iron on interfacing
Thread and a needle
Ribbon- About 60cm should be enough
Sewing Machine
Pins
Iron
Fabric flowers, beads, sequins or whatever else you want to embellish your collar with.
Instructions:
1. Cut out collar pattern, adding 1cm seam allowance. Pin the pattern on to the fabric and cut around it. Do this four times.
2. Cut off seam allowance from pattern, pin to interfacing and cut around four times.
3. Iron on piece of interfacing on to the wrong side of each bit of fabric. The bobbly side of the interfacing should face down on the fabric.
4. Sew on any embellishments to the front two pieces of the collar.
5. Pin the front and back of each side of the collar together with the wrong sides facing each other. Sew around the outside of the interfacing leaving a gap at the end where the ribbon will go. Cut a zig zag or little triangles on the fabric around the stitching.
6. Turn inside out using a paintbrush or something similar.
7. Cut ribbon in two. Fold over the open edges and put the ribbon in. Iron in place. Carefully sew the end shut with the ribbon inside. Repeat this for the other side of the collar.
8. Sew the two sides of the collar together in the middle with a few discreet stitches. I put another fabric flower over the stitches but you could put a bead, jewel brooch or whatever there.
Et voilà!
Subscribe to:
Posts (Atom)


